Batch Rendering with ProWalker GPU
How to queue multiple scenes for still rendering
Question — My SketchUp models often contain several scenes that need to be rendered. I typically use SU Podium's RenderAll and/or GenerateAll function to set up a queue and complete multiple renders without further input. Does ProWalker have a RenderAll equivalent?
Yes, you can queue multiple still renders in the Views/Paths panel.
Rendering a single still image is generally done by configuring all render settings in the main ProWalker viewport, and then clicking the 'Capture an image' button (camera icon) to render and export a still image.
Setting up a queue to render multiple still images must be done from the Views/Paths/Animation panel. To summarize: We will add several stationary "Views" to a movie timeline, and then render our queue using the Movie Export.
1. Compose SketchUp scenes before launching ProWalker
Configure your SketchUp scenes exactly as you would when rendering in SU Podium, including camera angle, date and time (shadow angle), and field of view.
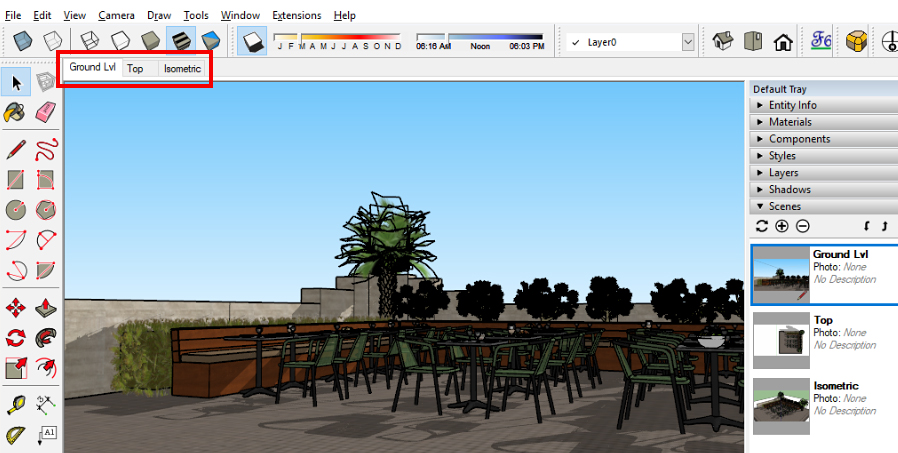
The three views we want to render are composed in SketchUp before launching ProWalker.
Alternately — You can set-up camera views from within the ProWalker viewport, however we think step is easier to perform in SketchUp.
Configure your SketchUp scenes exactly as you would when rendering in SU Podium, including camera angle, date and time (shadow angle), and field of view.
The three views we want to render are composed in SketchUp before launching ProWalker.
Alternately — You can set-up camera views from within the ProWalker viewport, however we think step is easier to perform in SketchUp.
2. Launch ProWalker GPU, preview render settings
Now would be the time to perform preliminary tests in the ProWalker viewport to determine the Render Mode, termination criteria (sample count), lighting, and background settings you will render with.
When you are ready to render, open the View/Path panel to proceed.
3. Import SketchUp scenes into the View/Path panel
In the View/Path panel, click 'Import SketchUp Scenes' to bring your scenes into ProWalker as views. Your SketchUp scenes will appear in the left-hand column of the window.
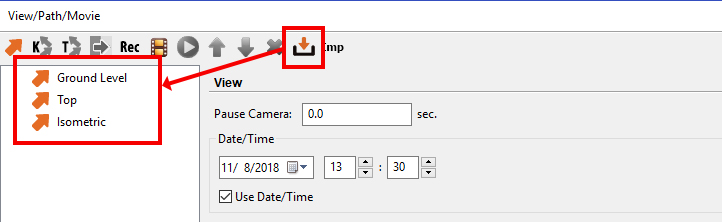
Instead of converting the three scenes into a keyframe path like we would do for an animation, we will add them directly into a movie queue.
4. Add scenes to a movie
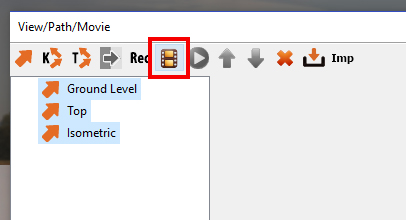
Shift + Select all the scenes you would like to render, and click the movie 'Add a new movie' button.
A movie icon will appear in the left column (pictured below)— if you click right arrow to expand the movie, you will see all your Scenes in a nested hierarchy.
Double click any Scene to preview it in the ProWalker viewport.
Tip — If you decide you want to change the composition of one of your views you can simply re-position the camera in the ProWalker viewport and then click the 'Add a New View' (Orange arrow) icon in the View/Path panel. The new View will appear in the left column, and then can be dragged directly into an existing movie item. Remember to then delete the discarded scene.
5. Finalize settings for each scene
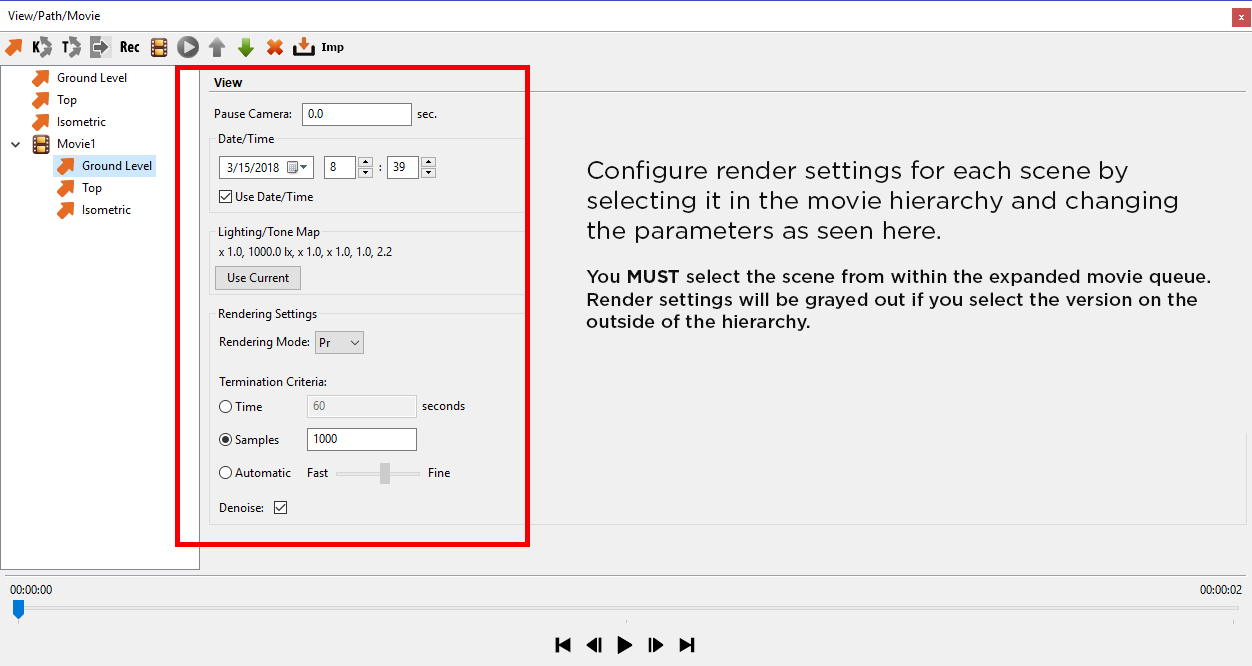
Expand the movie sequence by clicking the right-angle icon in the left column. When any of the scenes within the movie are selcted, the render settings interface will be visible in the View/Path window, pictured below:
WARNING - Render Mode for FIRST scene will carry through the entire queue
You cannot currently set render mode on a scene-by-scene basis for batch rendering. ProWalker will use whatever render mode is selected for the FIRST scene in your movie, and continue using that render mode for the rest of the scenes in the movie queue.
Also note, render mode selection DOES WORK with animation Paths. ProWalker only has problems recognizing the render mode attribute when processing still scenes that haven't been converted to a path.
This is very likely a bug, and we will continue to investigate. In the meantime, you should only plan to "batch render" scenes that will all use the same mode—all PR mode, for example. There is a workaround which involves converting still scenes into animation paths with a duration of one frame. We will write instructions for this workaround as soon as possible.
All other parameters work as expected
Date/Time, Termination criteria, Denoise on/off, and Lighting/Tonemapping all work as they should, and can be configured individually for each scene.

Lighting and tonemapping
To change the lighting on a scene-by-scene basis, select a scene in the hierarchy to see it in the Preview window. Use the ProWalker lighting dialog to adjust the lighting paramaters for that scene.
When you are satisfied with the light settings click Use Current to set the lighting for the selected scene. Repeat for other views as needed.
Pause camera
You should NOT use typically use the Pause Camera attribute when batch-rendering still images. Since we are rendering individual frames, all the pause attribute will do is cause a that single frame to be duplicated over and over for the duration of the pause. (A one second pause will cause 30 duplicate frames to be saved in the destination folder, for evample).
There is one exception to this rule—if you wanted a slideshow video to be saved along with your still iamges, you could pause for a few seconds on every scene, and then use the crossfade transition between each camera view. The result would be a simple slideshow video that would cycle through all the scenes that were rendered as part of that batch job.
6. Ready to Render
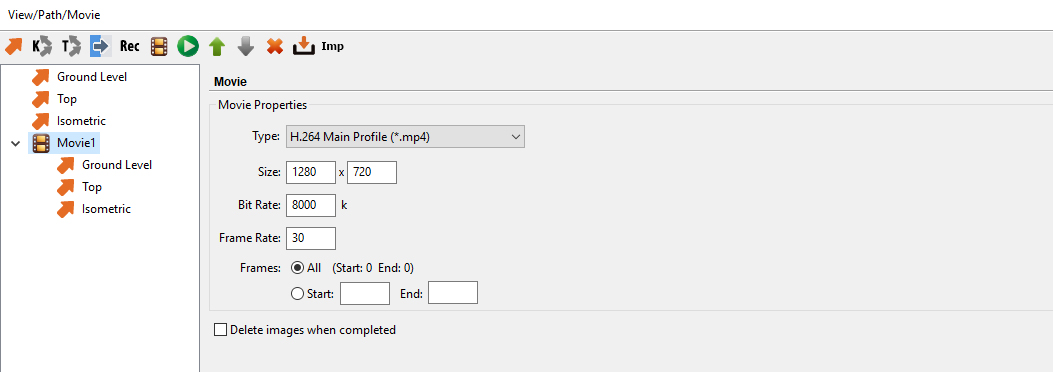
Select the Movie in the left column, and the Movie Properties interface will appear. Since we are rendering still images, we can ignore most of these input fields. However, it is absolutely essential that the "Delete images when completed" toggle is left UN-checked.
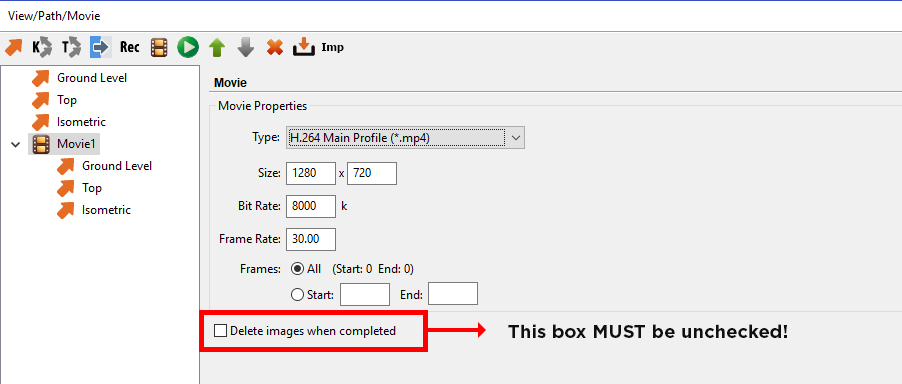
Image Size - Before rendering, be sure to set the the output resolution of your rendered images. There is currently no way to specify resolution scene-by-scene; our recommendation is to render more than what you need and then crop if necessary.

Click the play icon to begin Rendering. Choose where you want to save your image files (a sub-folder will be created containing the still images).
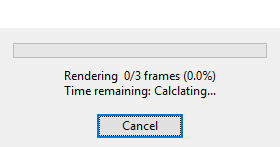
The progress dialog correctly shows three frames in the render queue.
You will likely notice that ProWalker saves an .mp4 file along with the finished still images. Because the .mp4 is only three frames long, it will be virtually useless and can usually be deleted. (The exception is if you added pauses and transitions, as mentioned in the previous section.)
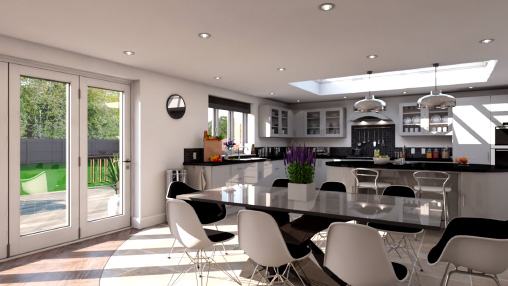
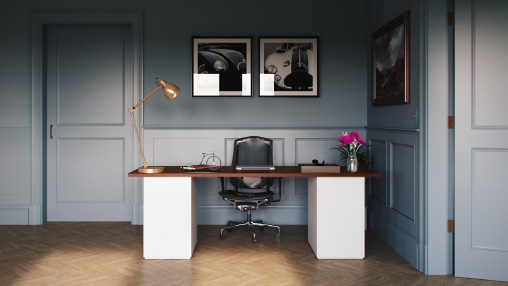
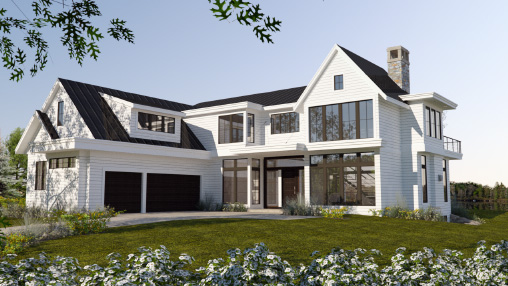
7. Results
And here are the three views of our simple Podium Browser patio assembly, rendered in a single continuous batch-job with about 1000 samples per image. A simple job like this actually renders very quickly, even on mid-range hardware—this didnt take more than 10-15 minutes total on a GTX 1060.


Remember, if you want to do post-processing but don't have a third party image editor installed, you can load the finished images into Podium Image Editor just like any other render.
8. Caveats and shortcomings
Though this workflow generally works quite well for a set of images that all require similar settings, there are three drawbacks to this method for batch rendering:
- Render Mode — As mentioned above, when batch-rendering still images in ProWalker you must use the same render mode for all scenes. This is likely a bug, and will hopefully be resolved in a future update
- Background and Sky — As with the Render mode issue, there is currently no way to change the Sky/Background from scene to scene. ProWalker will use the current selection in the Background Settings dialog for every scene in your queue.
- Aspect Ratio - ProWalker does not have a built-in mechanism to set the preview window to a specific size and aspect ratio. This means that the composition you see in the preview window may not be an exact match for the scene you composed in the SketchUp viewport, nor the image that ProWalker actually renders. There are creative ways to deal with this that involve a bit of additional legwork
- We discussed Eneroth's 'Viewport Resize' plugin in this video which provides a way to scale your SketchUp viewport to an exact value/aspect ratio.
- Viewport Resize cannot target the ProWalker window, but you can get reasonably close by manually scaling the ProWalker window as close to the shape of the SketchUp viewport as possible.
- You can then compensate for the lack of precision with the time-tested fallback of rendering a safe margin — that is, rendering slightly more than what you need and then cropping to a precise resolution in post-processing.