Quick Tip - Solid background color
Can I render with a solid background color in PodiumxRT?
Unlike SU Podium, PodiumxRT doesn't provide an option to use the SketchUp style as a sky and background for your render — so there isn't a built-in way to use a flat white or solid colored background while still using the SketchUp sun for directional lighting.
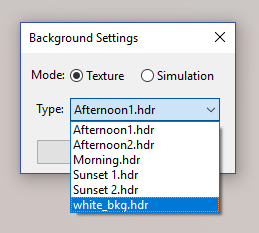
We can work around this however, by placing custom .HDR image files into the PodiumxRT backgrounds folder, and then selecting them from the HDRI drop-down.
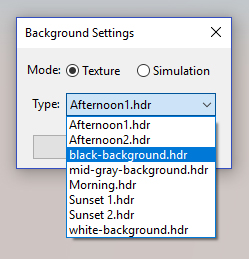
Any .HDR image placed in the correct folder will be available in the HDRI drop-down menu as shown above. In this way, we can render with a solid background color:
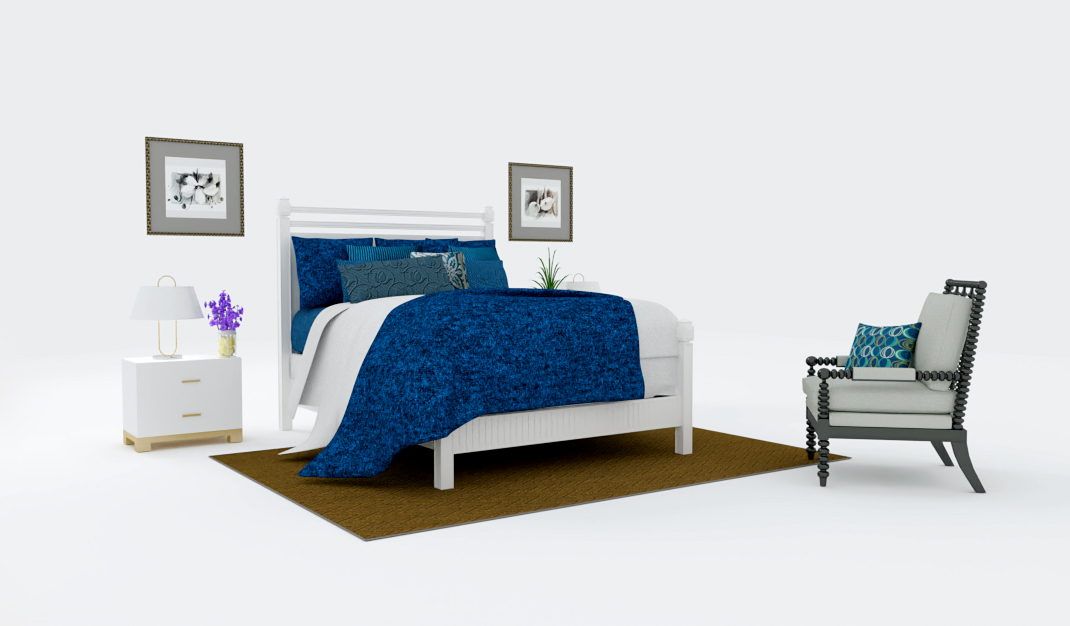
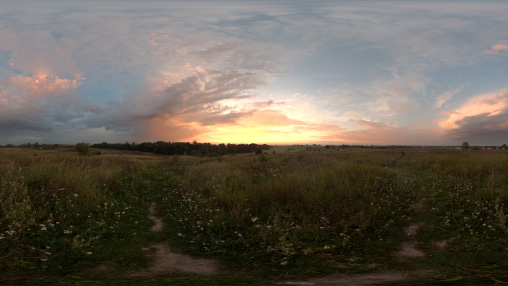
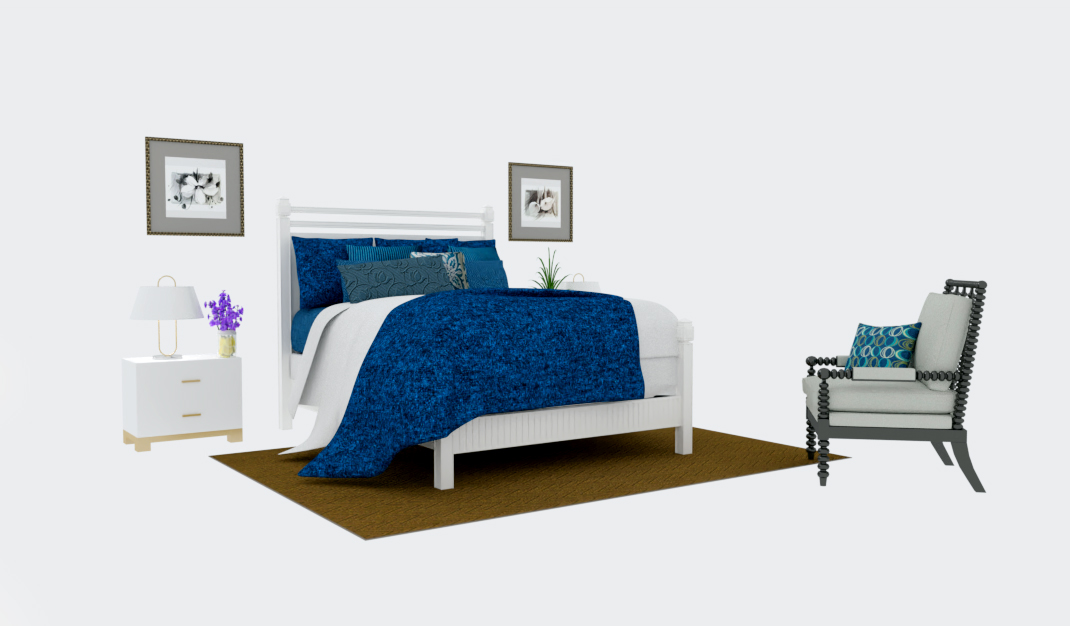
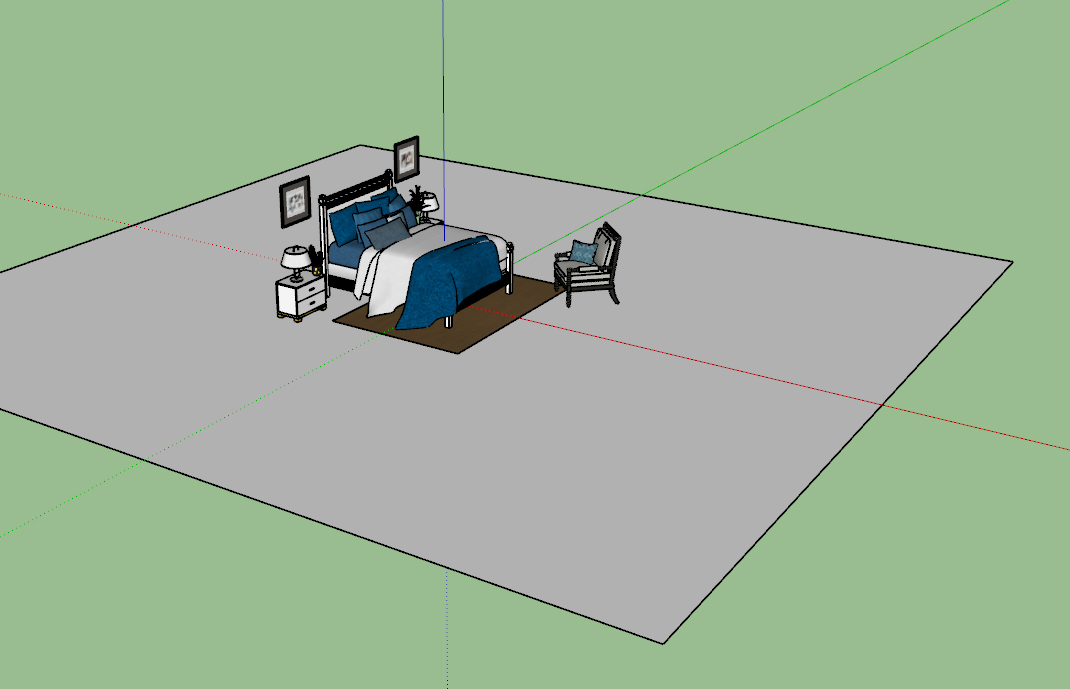
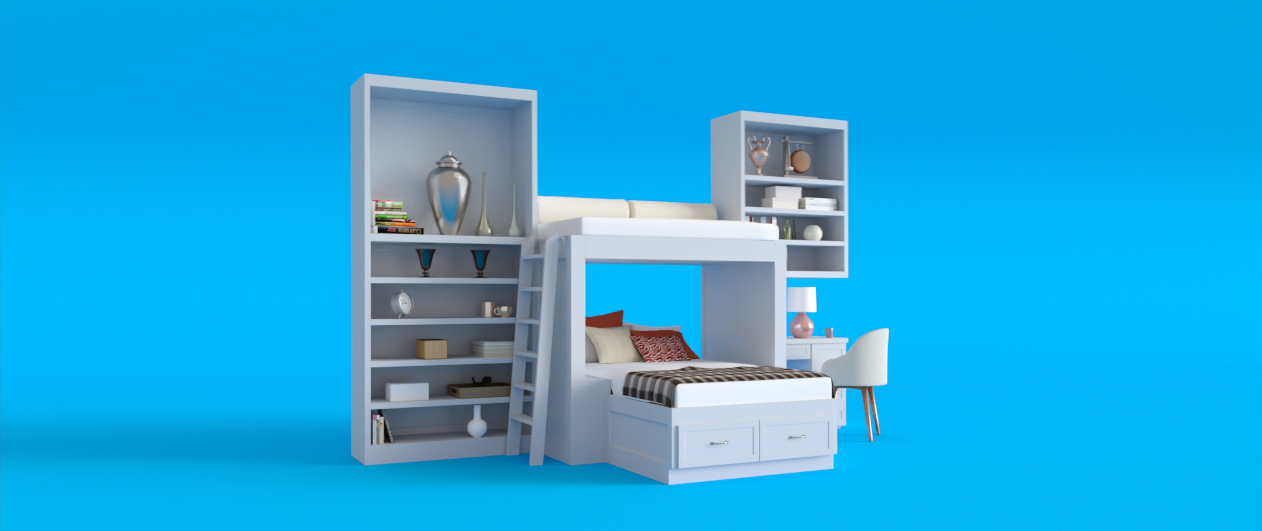
Bedroom assembly rendered in an empty SU scene with the White HDR background available below.
1. Pre-made solid background images to download
Solid background images are easy to make with an image editor like Photoshop, GIMP, etc., but do have specific formatting requirements. The three images available here are are the most frequently requested background options— white, black, and 50% gray.
Simply save them to your hard drive and then read the following instructions to install.
2. How to install custom background images
To make additonal backgrounds available in the HDRI drop-down, simply paste/save the .HDR image files into the PodiumxRT backgrounds folder, pictured below:
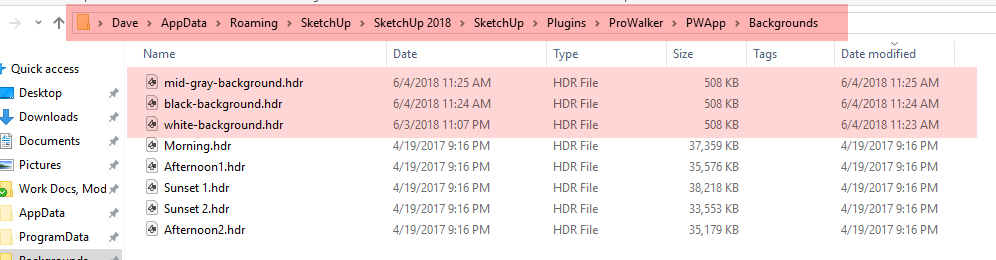
This is the exact file-path for the backgrounds folder:
C:\Users\Username\AppData\Roaming\SketchUp\SketchUp 202x\SketchUp\Plugins\PodiumxRT\PWApp\Backgrounds
- Background images MUST be saved in the .HDR format.
- Background images must have a 2:1 aspect ratio — ie. 10000x5000px
- Please note, AppData is hidden by default on many Windows machines. If you do not know how to make it visible, please read here.
- Mac Users note
The User/Library / Application Support folder where the Sketchupxx/plugins folder is located is always hidden.
- Follow this method to show the package contents of the PodiumxRT.app to locate the background folder
- Open Finder and open your User directory
- Press Cmd + Shift + Period (.) to show hidden files.
- In your user account folder, go to Library (will look greyed out)/ Application Support/ SketchUp 202x/ Plugins/ PodiumxRT/
- Open the PodiumxRT folder and you will see several files. One should be named PodiumxRT.app or simply maybe named PodiumxRT
- Right click on this folder and select Show Package Contents
- Go to Contents --->Resources--->Backgrounds
Backgrounds folder is where you want to save additional .hdr files
The next time you open PodiumxRT, any added backgrounds will appear under the HDRI drop-down along with the five pre-installed HDRI backgrounds.
Solid white background with and without ground plane:
You can see, this gives us a very fast and easy way to produce a quick render of a subject against a white background. This setup is no more complicated than aiming the camera and choosing white-background.hdr in Background Settings.
No ground plane, 200 samples; click to enlarge.
With plane to capture ground shadows.
The typical user that has asked about achieving the above style was interested in a solution for high-volume projects, where a lot of images needed to be produced quickly.
The second example uses a very simple ground plane to catch shadows and give the image a touch of context.
Tip - Smaller ground planes "disappear" against the background more easily than larger ones.
Tests with larger planes stretching far beyond the subject tended to have visible edges in the final render, particularly near the horizon.
Studio-based alternative:
Please note that we reccomend a different approach for editorial style imagery with a more "art-directed" look.
Taking the time to model a studio set as explained here yields a very different kinds of image. This does take longer to set up but affords more control over the final look.
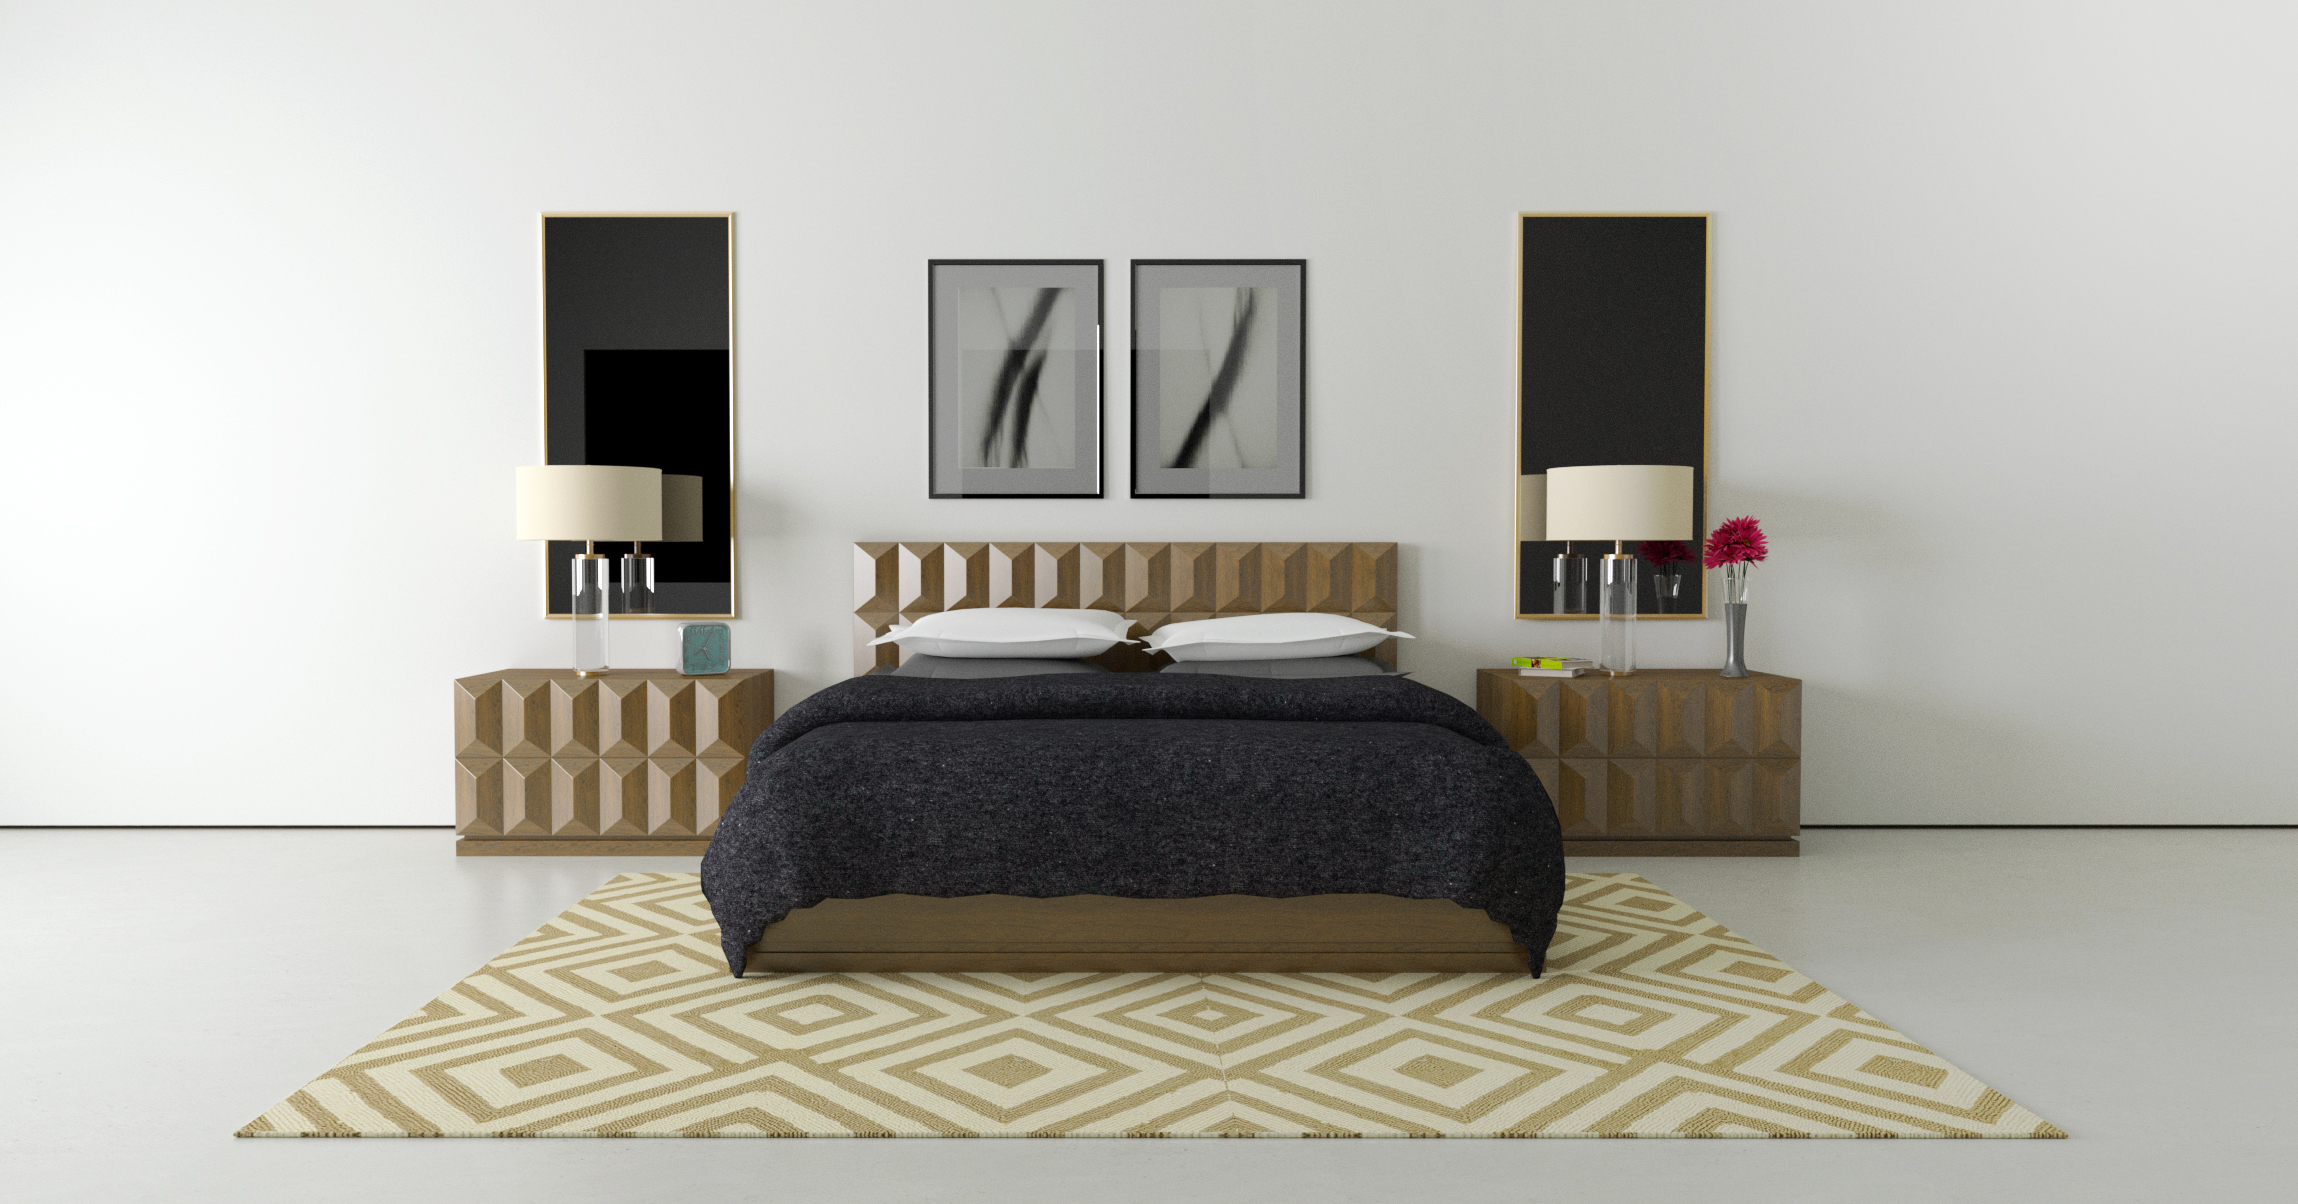
Bedroom image rendered against a simple studio set instead of relying fully on an HDR background.
3. What is the purpose of black-background.hdr?
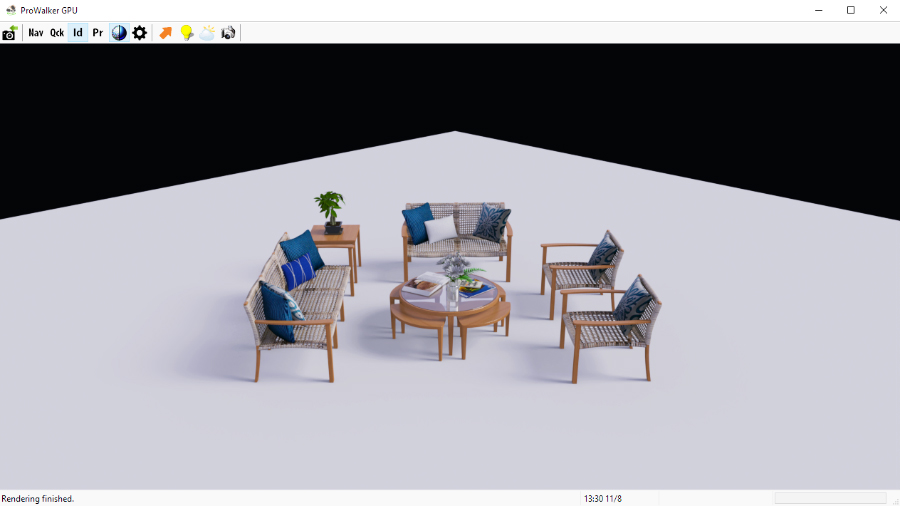
A pure black HDRI background gives us a way to turn off the sky entirely and illuminate a scene with artificial lights only; there are niche cases where this can be very useful. If you need to isolate a subject for example, one possible workflow is to select the black HDR image and use overhead LEM lighting.
For example: In the following images, we needed a dark background to accomodate white text overlays for a presentation.


The resluting imagery gives us a clearly defined focal point, but plenty of empty space for light-colored text and additional graphic design elements.
4. Can I use a solid-colored HDR other than white, black, or gray?
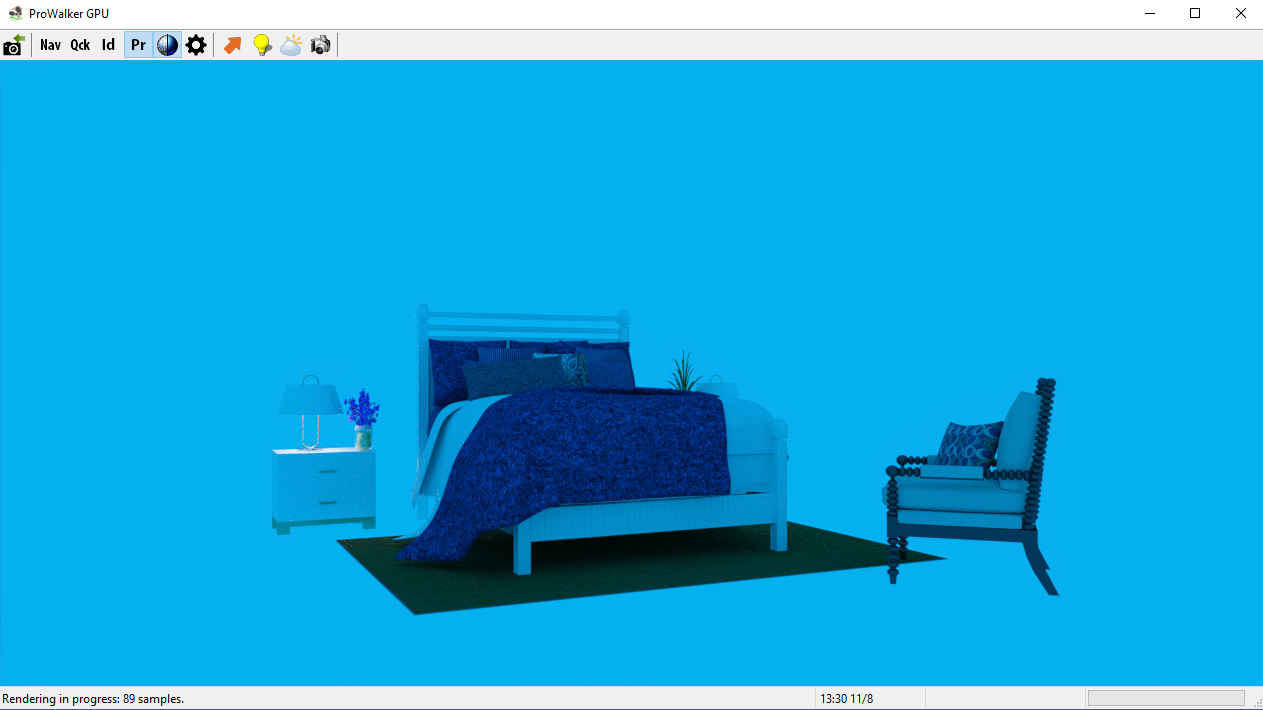
Not really. This is where the "HDRI only" approach starts to break down. HDR based lighting replaces the sun and sky so if you use a solid blue HDRI background, all the ambient light being emitted into your scene will be blue.
The resulting image will have a very pronounced color cast which overpowers the subject (as seen right).
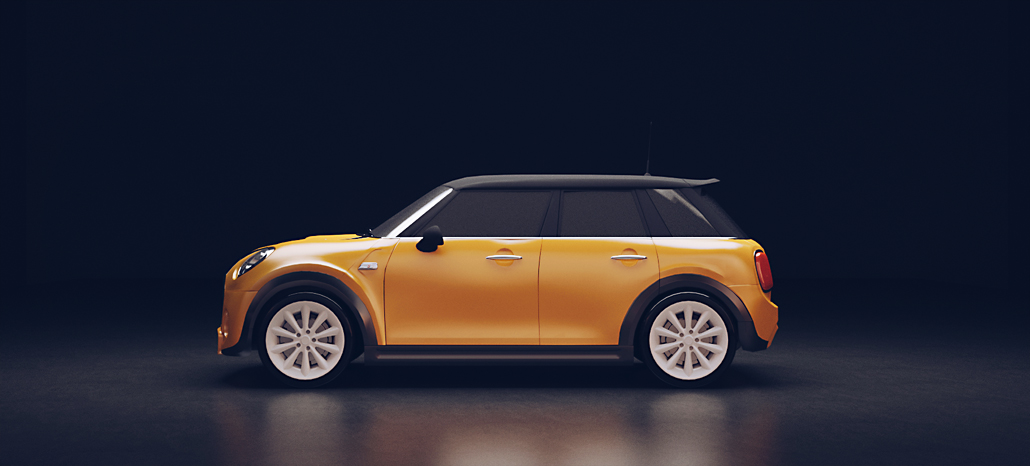
Instead, we can achieve a more pleasing result by physically adding a colored background into the SketchUp scene. In this example we used a simple 90° curve with about 80 segments, painted solid blue.
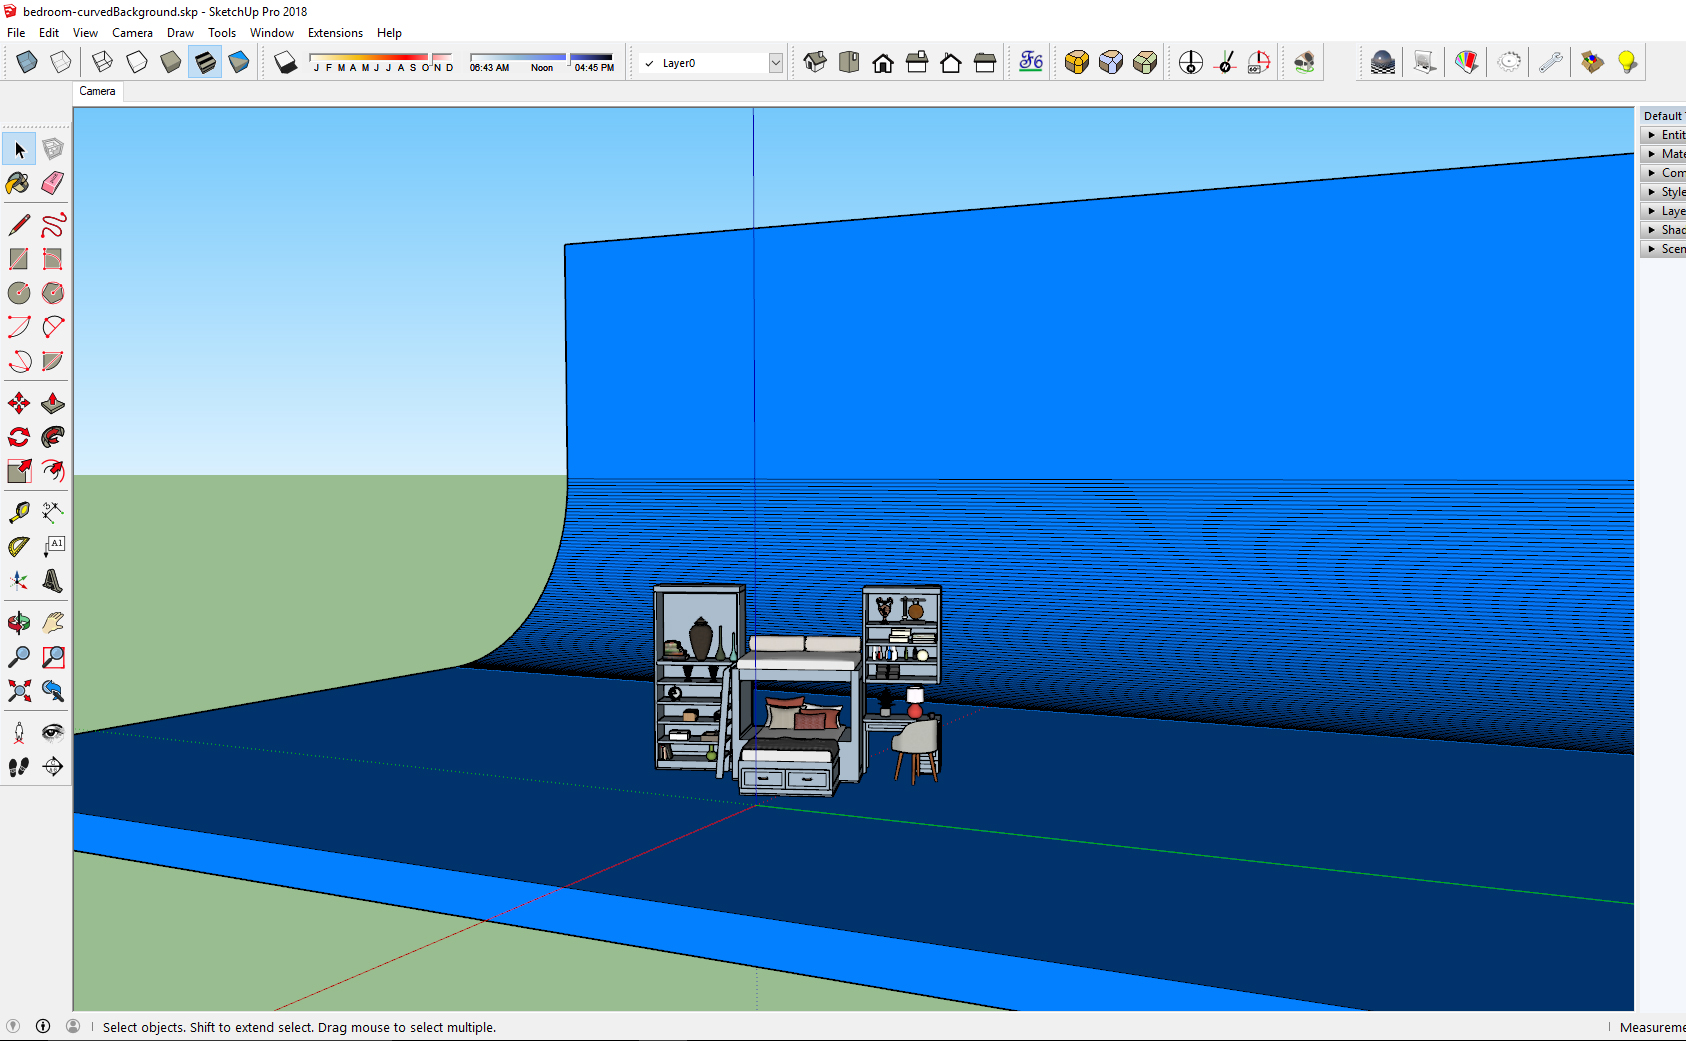
With this method, our render contains a vivid, colorful background that complements the paint color of the bed but does not wash it out.
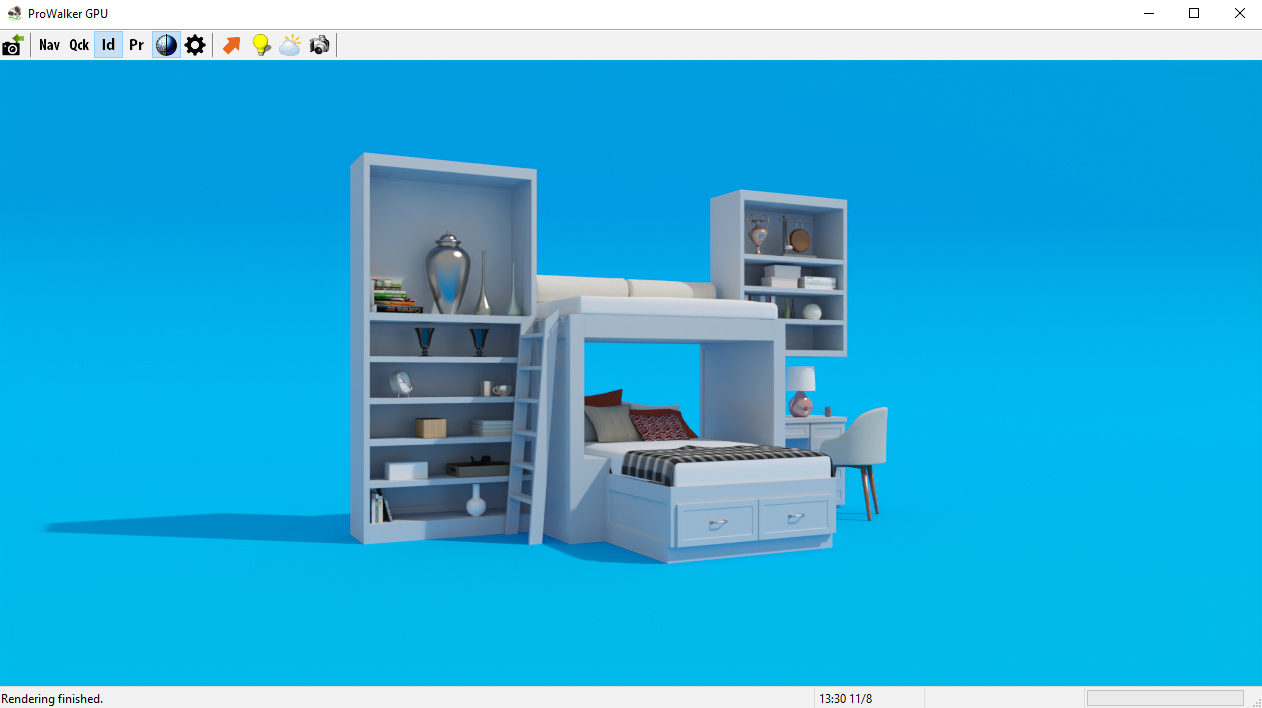
This render was lit with a gray HDRI background, which contains a sun to cast hard directional shadows. Any of the sun/sky simulations would have worked just as well with this scene.
If you wanted softer shadows you could use the 50% Gray HDRI background available at the top of this page, and then use LEM lights in your SketchUp scene to cast soft shadows.
A more advanced technique is to try creating your own HDRI studio images directly in Photoshop, which is what we have done for the image below.
Simply by enlarging and changing the shape of the light source, you can see we have softened the shadows considerably. Explaining this workflow in detail is beyond the scope of this page, there is an excellent explanation of the workflow here: Creating custom studio HDRIs in Photoshop.
Get the model: — Bedroom assembly with studio backdrop
Get the HDRI background: — Gray HDRI with hard shadows
Get the HDRI background: — Gray HDRI with soft shadows
Creating your own background images for PodiumxRT:
If you need something different from the options provided above, simple .HDR backgrounds are easy to create with photoshop or any similar editing software.
Remember, PodiumxRT backgrounds must adhere to two formatting requirements:
1. Image format requirements
- The image must use a 2:1 aspect ratio — the width must be 2x the height in other words.
- The image must be saved as an .HDR file. — PodiumxRT will only recognize .HDR images in the bakgrounds folder.
2. Creating a simple .HDR image with Photoshop:
For this example, let's assume we want something brighter than the 50% gray background, but lighter than the pure white .HDR file provided above.
Recap:
- Create a new document with a 2:1 aspect ratio — For a solid color, the image size is not all that important because we don't have to worry about pixelation; something like 4000x2000px will work fine.
- You should generally work in 32-bit color when editing .HDR images so that the upper and lower radiance values don't get clipped. However in this example it doesn't actually matter because we are working entirely within the visible RGB range.
- Select your desired color with the color picker.
- Go to Edit Fill and fill the canvas with your chosen color.
- Go to File Save As and select Radiance (.HDR) from file type.
- Browse to the PodiumxRT backgrounds folder, and save the image.
- Next time you open PodiumxRT CPU, your new HDRI background will be available in the texture drop-down menu.
3. HDRI background from SketchUp style:
What if you want an HDRI background for PodiumxRT that is identical to one of your commonly used SketchUp styles? This can be accomplished using the SU Podium V2.5+ panoramic option to create a 360° render of an empty SketchUp scene.
How to create an HDRI image from the SU Podium 'Twilight' Style.
- Open an empty SketchUp scene and select the Podium Twilight SketchUp style.
- Position the camera about 5 feet above the ground and as close to the origin as possible.
- Reset tilt - Use the Podium reset tilt command to minimize distortion.
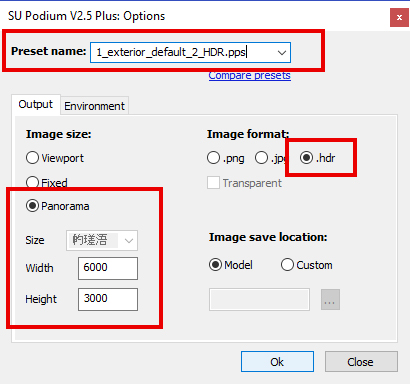
Extensions > SU Podium V2.5+ > Tools > Reset Tilt. - Podium Output options - Open the Podium options dialog; select Panorama and enter an output resolution — something like 6000x3000 is good for this purpose. Choose .HDR as image your format.
- Podium Preset selection - When rendering to .HDR you should always use one of the Podium HDR presets, which are available here.
- Podium Environment options In the environment tab, make sure you select "Default (set in SketchUp)"
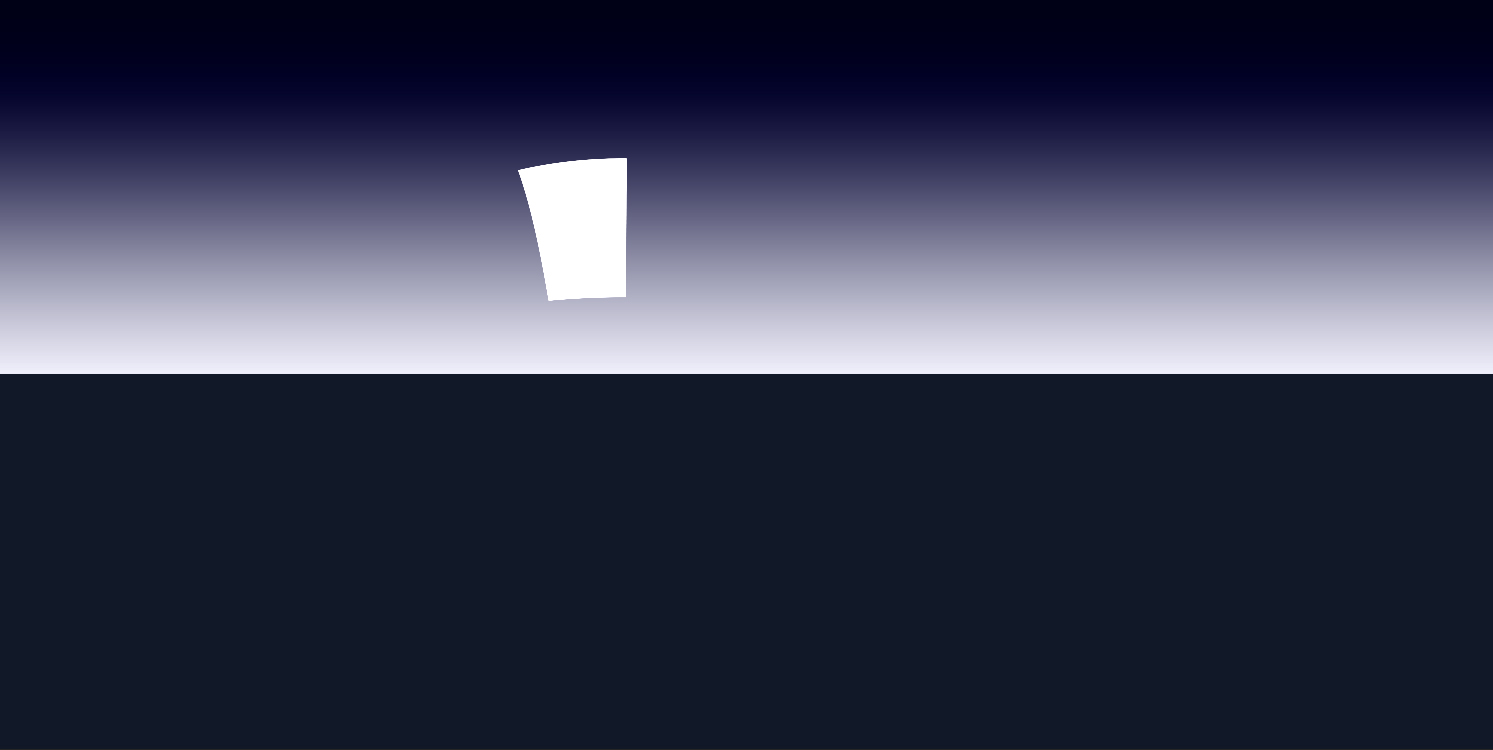
- Click Render - The final result will look something like this. We color corrected slightly in Photoshop to darken and desaturate the sky.
 Of course, this same image could also have been created in Photoshop or Illustrator directly. As with most things in computer graphics, there are often several paths to the same result
The big takeaway from this last demonstration is that an .HDRI background can actually be created from any SketchUp scene using SU Podium's 360° panoramic option with .HDR as the output format.
4. HDRI with Podium LEM light
Technical caveat - Podium's artificial light sources will show up and emit light if they are visible in an HDR render; unfortunately the luminance range of Podium's .HDR output is "clipped." — that is, luminance values in Podium .HDR renders do not us the full 32-bit value range.
Therefore, Podium is not strongly recommended as a means to create studio HDRI images with a realistic dynamic range unless you fully understand 32 bit editing workflows in Photoshop.
Having said that, with some editing it is possible to create an HDRI in Podium that contains an LEM for shadow casting.
By modifying the exposure, contrast, and gamma in Photoshop, we can fairly easily give the image a dynamic range of about 8 exposure values (EVs)
This range is fairly realistic for a twilight scene, and the LEM should cast soft but visible shadows.
Download: Twilght HDRI with LEM panel.
The resulting shadow pattern contains soft, subtle shadows produced by the brighter half of the sky, and also a set of sharper directional shadows being cast by the LEM.
This HDRI would also work well for studio lighting with the curved background available above.