Introduction
After starting the plugin, PodiumxRT opens in a new application window, seen below:
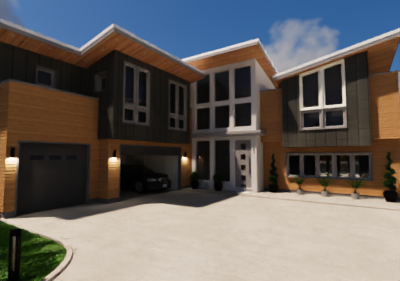
Upon launch, two things immediately occur:
- Your SketchUp scene (geometry, textures lighting, and materials) is *exported to PodiumxRT.
- Render calculations begin and the viewport preview image is progressively refined as samples (iterations) are completed.
*Note: There is not a two-way link between SketchUp and PodiumxRT for geometry or layer visibility. If you make changes to your SketchUp model, you must close and re-open PodiumxRT before the changes will be reflected.
PodiumxRT is a progressive render engine, which means it gradually improves the image from low to high quality as additional samples are completed. PodiumxRT only stops rendering when it reaches a user-defined "termination criteria" specified in the render settings dialog.
Any change to the camera or lighting/background settings will interrupt the preview render and cause the raytracing to begin again from zero samples with the new settings.
The goal with this approach is to allow for rapid iteration during the design process, since a clear preview will usually resolve within a few seconds. The user would then set the termination criteria to a much higher sample count when they are ready for a final render.
Navigation
Mouse based navigation
Using the Left, Right, Middle Mouse Button, and Scrollwheel, you can manipulate the PodiumxRT camera and move through your SketchUp scene to position the camera.
Right Mouse Button— Tumble/tilt the camera from a fixed position in space.Middle Mouse Button— Orbits the camera around the mouse pointer.Scrollwheel— Zoom in and out. The zoom target is the mouse pointer, same as in SketchUp.Shift + Middle Mouse Button— Pans the camera up, down, left, or right without affecting the camera tilt or rotation.Left Mouse Button— Moves the camera forward, backward and allows for lateral rotation along a constant camera height.
Date and time
You can change the SketchUp date and time settings by holding Ctrl + Left Mouse Button and dragging the mouse to the left or right. This action is best performed in Nav or Quick mode.Snyc Camera with SketchUp
Pressing the sync button will snap the PodiumxRT camera to whatever view or scene is current in your SketchUp viewport.
This provides an alternative to the navigation controls listed above move from one SketchUp scene to another without reloading the model. However, on and off layers in various scenes or different geometry will not be loaded.
Screen Capture and Always on Top UI

There is a new way to save your image besides using the Camera to save a .jpg or .png file. You can now use Snapshot which will create a snapshot of the etnire PodiumxRT rendered scene. This saves some time rather than saving an image file which re-renders the scene to your desired resolution. Once you are satisfied with your rendered scene, snapshot will instantly create a .jpg file at the same resolution that the PodiumxRT rendered scene is. The only disadvantage is the resolution of the snapshot image will be the same as the PodiumxRT render scene. You may want to change the resolution of the snapshot image. You can use an image editor to change the resolution of the snapshot image. We recommend Topaz Gigapixel AI if you need to rescale the snapshot image.

This button will put the xRT rendered scene alway on top of SketchUp instead of dropping it down to the task bar/ dock. You can toggle this on or off.
Denoise
Denoise greatly improves the speed and responsiveness of the path tracing. It is built in the PodiumxRT.
With denoise, PodiumxRT is able to produce a clean preview render within seconds, and can reach final-frame quality at a far lower sample count than without.
The denoiser will almost always eliminate the noise in an image before the edges have reached a sufficient level of refinement. Often an image that "looks finished" at first glance, could benefit from additional samples to clarify edges.
Render Settings and Samples
The quality of a still render or animation depends on the number of samples/iterations that PodiumxRT is allowed to perform per frame.
It's up to the user to decide what quality level is preferred for a finished frame, and specify when PodiumxRT should stop and save the image. This is known as the 'termination criteria.'
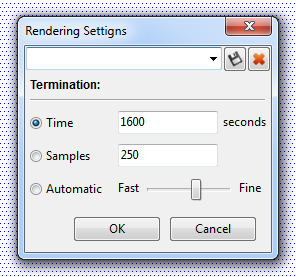
PodiumxRT provides three options for termination criteria:
Time:
Sets a maximum time limit per frame. When that limit is reached, Podium Walker moves to the next frame whether or not all noise has been resolved.
Samples:
Sets a maximum number of samples per frame. Use this if you've done test renders and know how many samples are required for your desired image quality.
Automatic:
An automatic solution that attempts to find an efficient balance between speed and quality. Move the slider to the right for higher quality but slower rendering.
Paths and Animation Panel - not available currently
PodiumxRT's tools for creating and rendering fly-through animations contained within the View/Path/Movie dialog are not implemented in this version.
You can however, can import camera position from SketchUp scenes,
Lighting Dialog
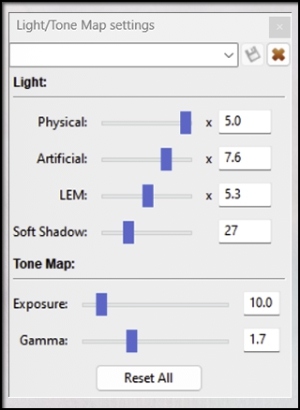
The PodiumxRT lighting dialog controls the strength/brightness of the physical sky, artificial lighting, ambient light, and light emitting materials.
There are also tone-mapping controls to make global lighting adjustments via the exposure and contrast sliders.
Physical, Artificial, LEM, SoftShadows
- Physical determines the brightness of the physical sun/sky system AND also controls the brightness when using image based HDRI lighting when the "HDRI" radio button is checked in the backgrounds dialog.
- Artificial a global brightness modifier for all artificial Podium lights in the scene, including spot lights and point lights but not LEMs. Changes to the individual brightness of artificial lights must be made in the SketchUp scene using Podium's Light Fixture Outliner.
- LEM a global brightness multiplier for all light emitting materials in the scene.
- Soft Shadows will soften the reflection of point lights/ omni lights by increase the value using the slider. The value in the text box is the radius of the point light in millimeters. The greater the value, the softer and larger the light reflection.
Exposure, Gamma
- Exposure This is an illumination adjustment applied linearly to all pixels in your image to lighten or darken the render. Generally, we recommend you use the "physical" slider to get your illumination as close as possible to the desired result before touching the brightness slider.
- Gamma In PodiumxRT, the gamma slider works similarly to a contrast adjustment in Podium Image Editor. Lowering the Gamma value will appear to increase contract, darkening shadows and brightening highlights. Increasing the gamma slider beyond 2.2 has the opposite effect, compressing the value range and decreasing contrast.
Like materials, PodiumxRT does not have its own interface for creating artificial lights. The user must therefore use the SU Podium lighting dialog for this purpose or use Podium Browser Light Fixtures
- None of the light/ tone mapping settings are saved. They are lost as soon as you close PodiumxRT. However, you can save customized settings if you create a name for the customized settings and then use the disk icon to save the name. The is much like creating a preset in SU Podium.
- Create a name in the blank field close to the top of the Lighting/ Tone mapping setting dialog box. Then select the disk icon. This will save the lighting settings as a name. Make sure you save the .skp file. When you re-open the same .skp file, the customize settings can be opened by opening the name.
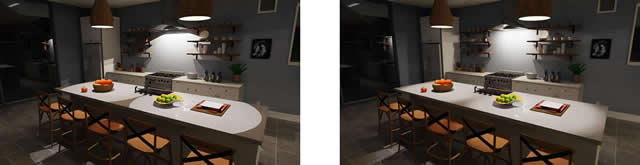
Soft Shadows
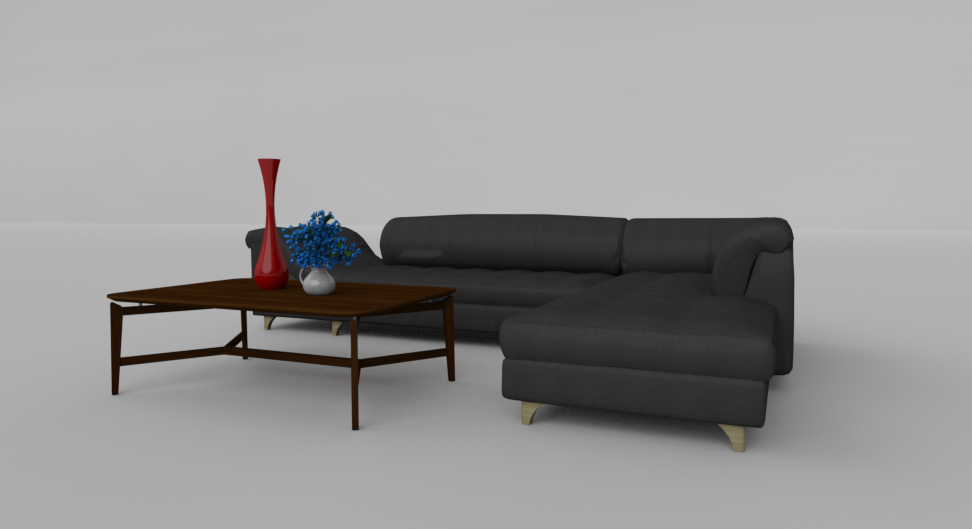
Soft Shadows will create soft point light edges where the light is reflected. The slider increases the radius of all point lights in the scene in millimeters. If this is set to 0, the light reflection edges will look hard. The larger the radius the software the light reflection and the points lighting will becoming larger. Below are two examples.
Saving Light and Tone Map settings to a Preset
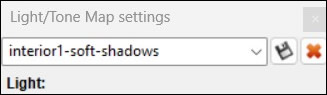
The Light Panel/ UI as well as the Render Settings UI, contain a field to save your adjustments to the light and Tone Map sliders and name the adjustments as a specific preset. For example, you will find that physical light in an exterior will appear much brighter than it is in an interior scene. Therefore, you could create an interior preset as well as an exterior preset.
The presets that you create are saved to your Registery in Windows and to a PLIST on your Mac. This means the presets can be used in any PodiumxRT rendering so long as you are using the same computer.
Currently the Presets do not stay with the specific SketchUp model and will not exist if you change computers.
To create a preset, fine tune the light and tone mapping sliders to the point you want to preserve the settings. Go to the top of the Light/Tone Map settings user interface. You will see a blank field. Name a preset to any name and select the disk button to save the preset permanently. The X button will delete a specific preset that is listed
 Depth of Field
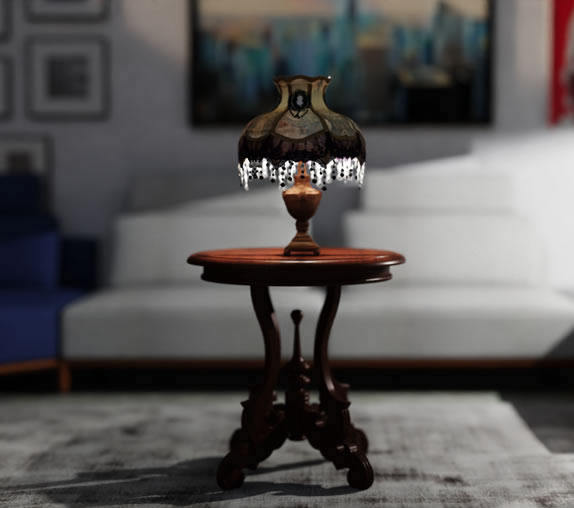
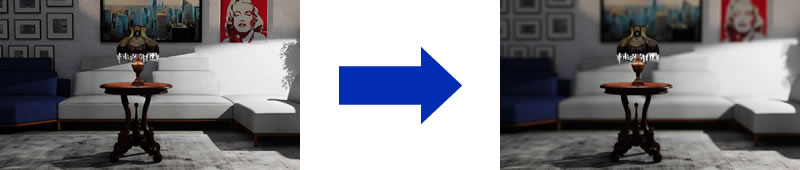
- PodiumxRT provides a method of creating depth of field images. That is, images where the background is blurred relative to objects that are in focus.
-
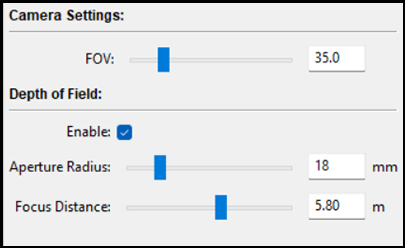
The user interface for DOF is at the bottom right of the PodiumxRT rendered scene. Click on the FOV:xx DOF:OFF area to open the Camera Settings user interface
-
To enable the DOF feature, click Enable. The default FOV is what your SketchUp FOV is set to. The DOF has two features, the Aperture Radius in millimeters and the Focus Distance. Although the Focus Distance unit is in meters, if your SketchUp is set to feet, it read feet distance.
-
Some trial and error, tweaking is needed to get the best depth of field image. In the above example, the FOV was set to 24. The Aperture Radius was set to 45mm and the Focus Distance was set to 3.47
Materials
PodiumxRT does not have a dedicated interface for creating and modifying materials (diffuse, reflection, transparency, refraction, etc). PodiumxRT instead recognizes and relies on SU Podium's materials dialog for editing these settings.
To configure material settings for PodiumxRT, open the SU Podium materials dialog and edit material properties there. Information about Podium material settings is here.
If you do not own an SU Podium license: You can simply install the free trial of SU Podium. When the trial ends, you will no longer be able to render with SU Podium, but you will still be able to access the material and lighting interface.
Compatible with Podium Browser materials: Additionally, if you prefer to select pre-made materials and lights, Podium Browser is fully compatible with PodiumxRT.
(Note - If you do not own SU Podium V2.6, Podium Browser requires a separate download and a purchase of a license).
Back Side/ Front Side problem. There is an issue with textures that are assigned to the back side of a face and then are exposed in the model. PodiumxRT will render these textures inversely. To avoid this problem, make sure exposed faces are front side and not back side.
How can you tell which face is front side and which is back side? There are a couple of ways to find out.

SketchUp has a nice tool that will turn off textures and display only the monochrome color of all the faces in the model. In SketchUp the normal or front side of a face is a light tan color and the back side is a darker, usually blue color. Using the monochrome icon in the Face Style tool bar, you can see which face is blue or back side. When you find the blue or back side faces, right click on them and use the Reverse Face option. You will have to reapply the texture to the front side face.
The other method is to right click on the face and pick Entity Info. You will see two image panes in the Entity Info box. The left side is the front side. The right is the back side. Which side is the texture on?
Backgrounds Dialog
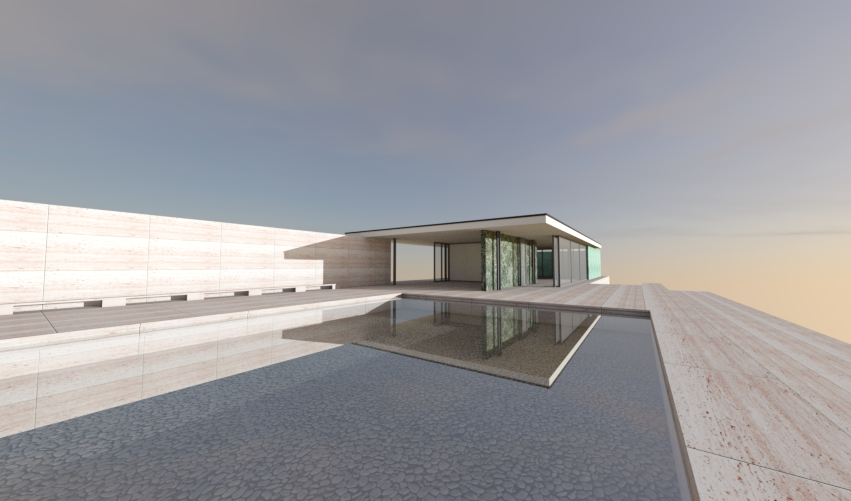
The Backgrounds dialog offers two different approaches for natural lighting: physical sky simulation, or HDR image-based lighting.
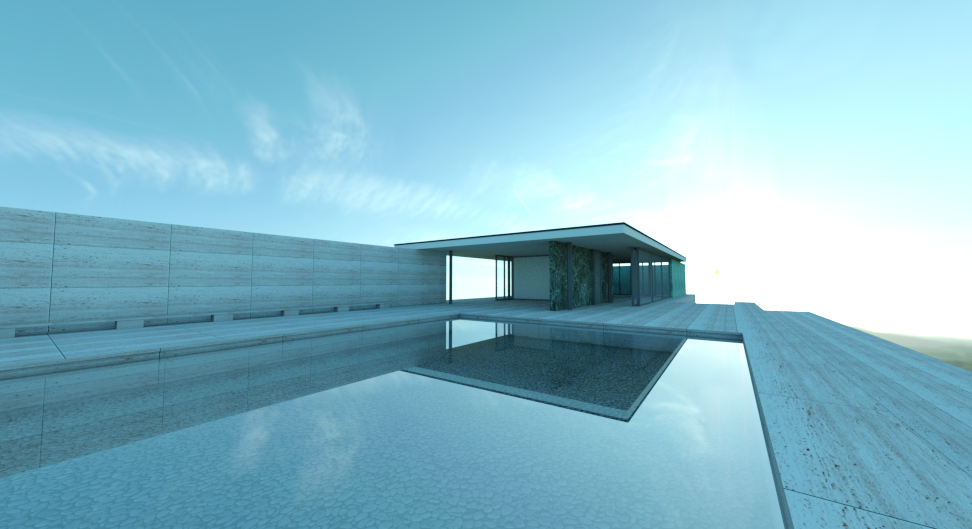
Simulation - Physical Sky Simulation
When Simulation is selected, the user can choose between five different physical sky simulations that use SketchUp's date and time settings to determine shadow angle and sky brightness/tonality.
- Advantage: Precise control over shadow angle. Simply change SketchUp's date and time settings, and use the free Solar North plugin for additional control.
- Advantage: Ability to animate shadows to create time lapse animations.
- Disadvantage: Limited to the five sky styles that are available in the drop-down.
Clear Sky
Cloudy 1
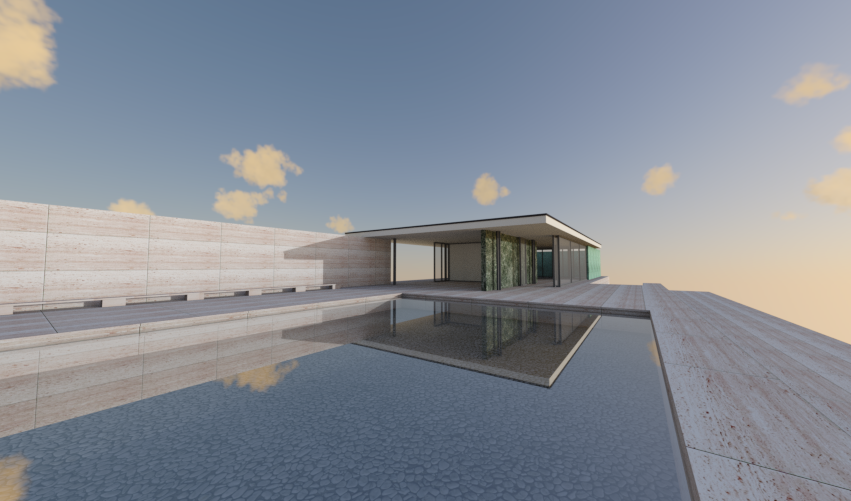
Fine 1
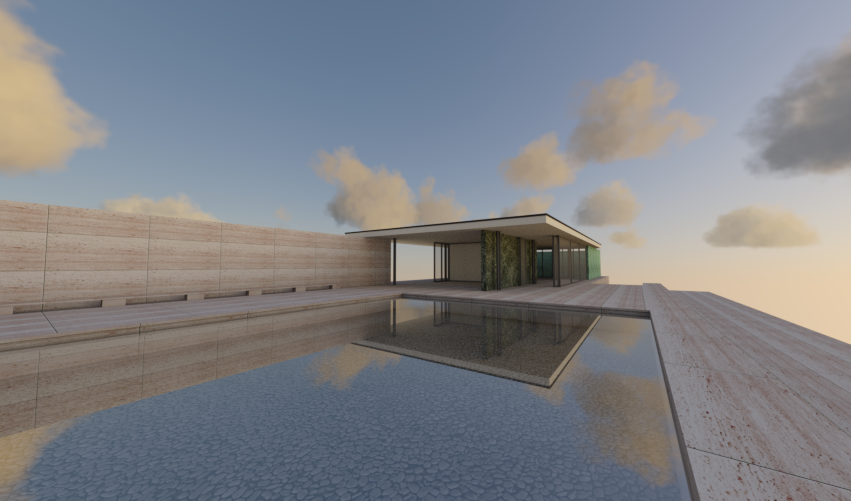
Fine 2
Image Based HDRI Lighting
When Texture is selected, PodiumxRT uses image based HDRI lighting to illuminate the scene. Five HDRI options are included with the PodiumxRT installation, there are 40 additional HDRI skies from the HDRI downloads page. These are not included in the installation to keep the file-size of the installation manageable, but are easy to install from the HDRI download page (see main menu).
- Advantage - Ability to rapidly test several different background styles, which all have their own tonal character.
- Advantage - HDRI lighting is very useful for studio and product rendering.
- Disadvantage - Less control over sun/shadow angle — the lighting embedded in the HDR file is what you get.
Clear Sky

Cloudy 1
Fine 1
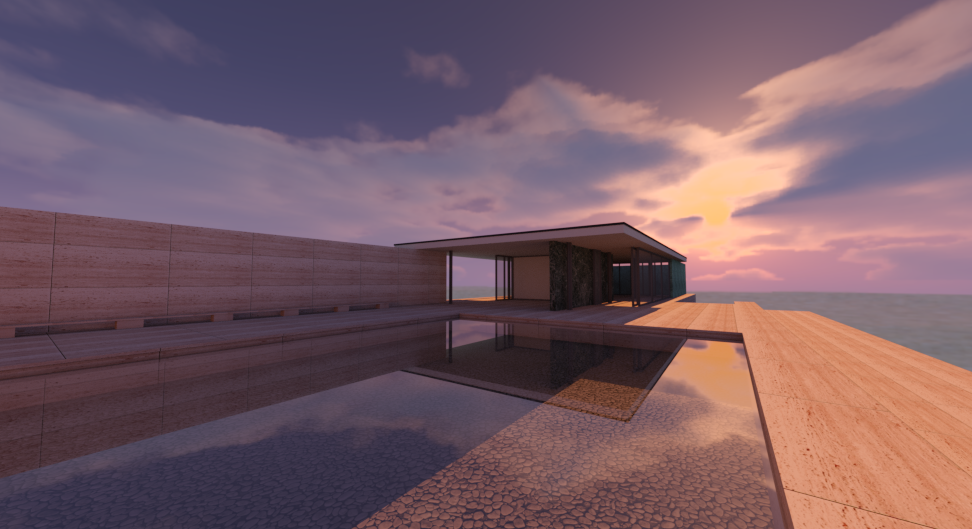
Fine 2
 Equirectangular Images for Panorama
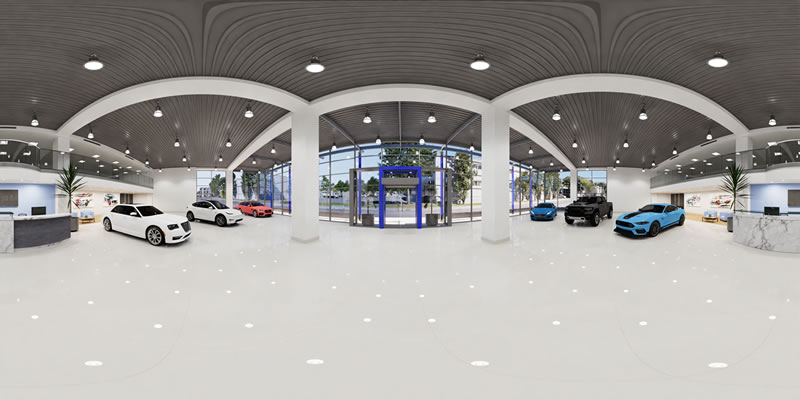
- Click on the image to see the full panorama
-
You can create 360 x 180 panorama images with PodiumxRT. This is identical to way SU Podium creates equirectangular images and these are then uploaded to a Panorama server such as panopdm.com
-
To create the equirectangular image, render the scene in PodiumxRT but first make sure that the SketchUp scene is not tilted. One method is to use SketchUp's two point perspective or SU Podium's Reset Tilt in the SU Podium Tools menu. Render the scene with PodiumxRT and when ready to create the panorama, select capture an image icon
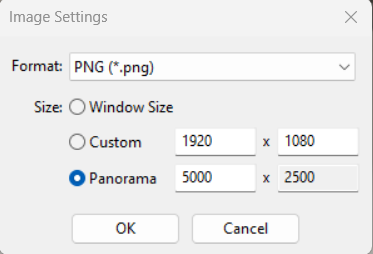
-
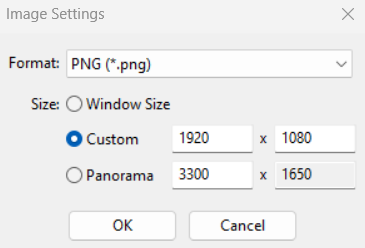
Select the Panorama option and enter the width pixel size. The height pixel size will automatically be calculated to be 50% of the width. On the Mac, the height box will be greyed out. You may need to close the UI once and open it again.
As with SU Podium, the higher the width pixel size, the higher the quality of the final panorama. The Capture Image process will take longer than a normal images due to the fact that PodiumxRT is rendering 360 degrees around the camera.
- This action will create an equirectangular image and save it to the folder of your choice.
-
To create a full HTML panorama that you can view and share with others, you can upload the equirectangular image to panopdm.com. This process is described here under
Sharing a Panorama using the Panorama server. Please note that PodiumxRT has no PIE in its user interface so you will need to upload to panopdm.com directly from your folder.
Capture an Image - Exporting a Still Render
The image you see in the PodiumxRT viewport is a preview image meant to assist as you fine-tune lighting, composition, and samples/render mode and creating a screen capture of the screen. Besides the screen capture method of saving an image, you can use the camera icon to export a still render as both an the screen size image (Window), a custom size image or an equirectangular image for Panorama viewing. The Panorama option will take much longer to render as it is rendering 360 X 180 view. You must use this user interface to create a equirectangular image for your 360 X 180 Panorama.
The advantages of using Capture an Image is you can always control the image dimensions and you can create equirectangular images. The disadvantage is Podium will re-render the scene where as Screen Capture is instantaneous.