Animation in PW

There are three ways to create an animation in Podium Walker: Keyframe animation, Tour animation, and by simply recording your camera movements in real-time.  Lets go through the process:


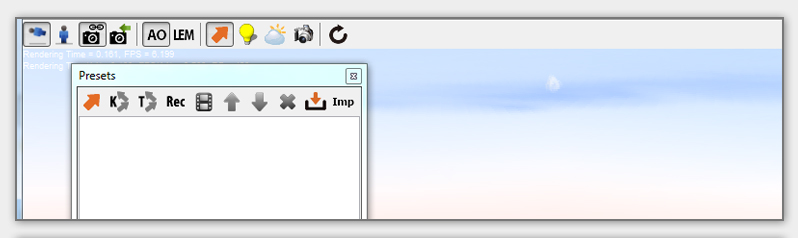
1. Launch the Preset Panel

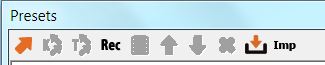
Click the orange arrow to launch the preset panel.  This dialog is where we will do most of our animating in Podium Walker, including setting keyframes and recording camera movements.

preset-menu


2. Setting Keyframes Manually

Keyframes are an accurate and easy way to create animations in Podium Walker.  Using the preset panel, you can create a series of views or “keyframes.”  Each separate view will be treated as a key frame in the animation, and Podium Walker will automatically interpolate the camera path connecting them. If your SketchUp model already has multiple SketchUp scenes, these scenes can be imported as key frames (more on this later).

To create a keyframe, move your Podium Walker camera to the view you want to use, and press the orange arrow button in the Preset panel. A window will pop up asking whether you’d like to rename the preset–rename it if you wish, and then press OK.  Your camera view will be added to the list as “View1″.  Repeat this as many times as necessary.  The order of your views can be arranged in the preset panel using the up and down arrows.


3. Creating an animation path from your keyframes:

Once you’ve finished setting keyframes, you’ll need to convert them to an animation path.  To do this, shift + select all the keyframes you want to include in your animation.

presets
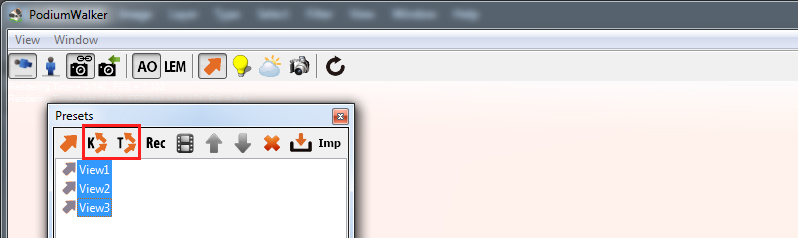
When you’ve selected more than one keyframe, you’ll notice that the K and T icons in the preset panel will now be available to you (these are grayed out by default).  Pressing either of these icons will convert your keyframes into an animation path.

Two Options – K and T – The primary difference between the two path options is in the way that Podium Walker treats each keyframe in your animation path.

  • K (Keyframe animation) – If you press the K icon, Podium Walker will create an animation path from keyframe to keyframe, interpolating between each position as smoothly as possible.  This yields a very nice fly-through effect that can work very well as an end product.
  • T (Tour animation) – Tour animations work almost the same way.  Podium Walker still automatically interpolates the camera path between keyframes, the only real difference is that Podium Walker will pause on each view for a designated period of time.  This can be set manually (an option dialog will pop up when you press the T icon).

When you press either or the K or T path icons, a dialog will appear, where you can name the animation path and set the camera speed.  Podium Walker’s default camera speed is 100 inches/sec, but PW will automatically display the last speed that you used.  Faster camera speeds will yield a shorter animation (and fewer overall frames), so if you’re in a hurry to export video, increasing the camera speed can be a good way to do so.


When you’re finished click OK and your animation path will appear in the preset window.  You can double click the path the play through it in the Podium Walker viewport.


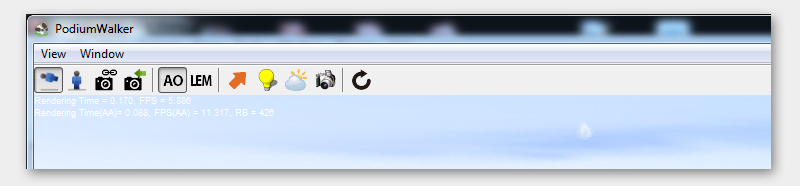
Recording The Screen:

recIf you start the Rec operation, Podium Walker will create an animation path from your mouse camera movement. Click on Rec when you are finished recording the screen. This method is particularly very useful if you are creating static time-lapse animations (see below).


Creating a time-lapse animation:

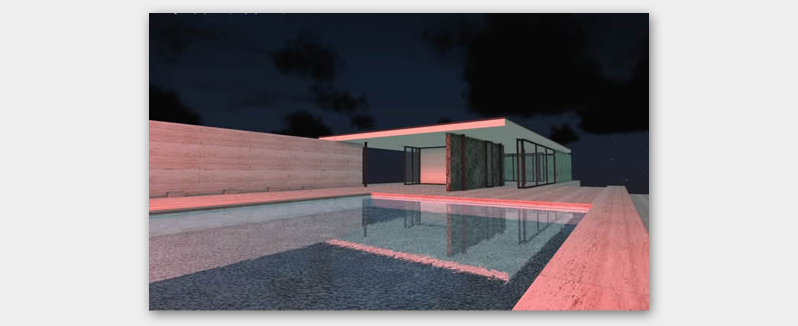
A time-lapse with moving sun/shadows can be created using the Record feature, discussed above.  Turn REC on, and use Ctrl + Right Mouse drag to change the position of the sun and shadows.  This effect is shown in the following video:


4. Importing keyframes from SketchUp or SU Animate

Importing scenes from Sketchup – If you have already created a number of separate camera views (scenes) in SketchUp, and wish to use these scenes as the keyframes in your animation, use the Import SketchUp Scenes icon (downward orange arrow) in the Preset panel. This will import all your Sketchup scenes and convert this to PodiumWalker views.

Note: only the camera position of each SketchUp scene will be imported. The sun position and hidden geometry on hidden layers will not be imported.

importing-SUAnimateImporting from SUAnimate – Podium Walker provides a quick way of importing SU Animate V4’s camera path’s or key frames into Podium Walker. After you have previewed the camera animation in SU Animate’s preview, Export the Camera Path. This will not work unless you have a camera animation. Export the Camera Path menu in SU Animate will create a CSV file. Import the model into Podium Walker using the Imp icon from the Preset Panel. Once the model is imported, go to Presets and IMP (import) the SU Animate CSV file. You will then see a Path in the Preset panel.


Menus & Navigation

1. The top menu:

Podium Walker has a relatively simple interface (pictured below).  Let’s go through the functions one by one:


Walk Mode/Fly Mode: The upper left of the Podium Walker window has the Walk Mode and Fly Mode navigation options.

  • Fly Mode – A mode without considering gravity.
    There is no collision to any objects. View point height is ignored.
  • Walk Mode – A mode that simulates walking on the ground.  This considers gravity. This mode detects collision. You can You can Jump by using the space bar. The view point is always located at current SketchUp camera height except when using jump.

Connect SketchUp and Podium Walker camera:   constrain-cameraThe two camera icons are used to synchronize Podium Walker’s camera with SketchUp’s.

  • Always Synchronize (left icon) – By pressing the “always synchronize” icon, Podium Walker’s camera will become linked to the camera in your SketchUp scene, and vise versa. This is a two-way link, meaning if you move the camera in SketchUp, those changes will carry over to Podium Walker; likewise if you move the camera in Podium Walker, those changes will be reflected in your SketchUp scene.
  • Snap to SketchUp Camera (right icon) – Pressing the second camera icon will synchronize your Podium Walker camera with SketchUp’s, however this is not a two-way link, and does not affect your SketchUp camera.  It simply updates the Podium Walker viewport to mirror the current SketchUp camera.

ambient-occlusionAmbient Occlusion – On/Off – The AO icon is used to toggle ambient occlusion on and off, to add subtle contact shadows to your scene.  This is on by default.

  • Podium Walker is a ray tracing rendering program. With the addition of Ambient Occlusion, PW can calculate light reflecting from surfaces not directly exposed to the light source. In other words, AO is indirect light. It is an approximation to full global illumination so it will not have the quality level of still images that SU Podium V2 can create, but the AO makes a significant quality difference when rendering interior walk-through animations.

The following comparison shows the increased clarity and definition gained through the use of Ambient Occlusion.  Not the increased clarity and definition around windows and in tight corners:


amb-occ-comparison


When AO is on, the raytracing speed decreasesin most cases the speed hit is worth it for the increased quality, however AO is not always needed especially with exterior renderings so PW includes an option to turn AO on or off.


light-emitting-materialsLight Emitting Material (LEM) Support – SU Podium V2 LEM lighting is supported in PW, however LEM lighting is very time consuming to calculate.  The larger your LEM materials, the longer Podium Walker will take to calculate it. As a default LEM is turned off.


lem-example

SU Podium V2 LEM is behind the camera in this snap shot taken from Podium Walker animation.


Turn LEM on if your SketchUp/Podium model contains LEM lighting. Please note, that the rendering time will take longer than with omni lights. If your camera is directly viewing the LEM material, the material will not appear illuminated as it does in a SU Podium V2 image. But in the Podium Walker, the LEM material is emitting light.

Read more about SU Podium V2 LEM lights here.


Presets Panel – presets-panelThe orange arrow button will launch Podium Walker’s preset menu. This dialog is where you will create camera views that you will combine to make an animation path. The preset panel is discussed in further detail in the section on creating animations (LINK).


Light Settings – Light/Image setting UI gives you control over various global lighting and image settings.

The light intensity section is self explanatory; each slider will increase the intensity of each type of light source globally.

Lighting dialog allows for real time changes in Podium Walker’s natural light (sun and ambient) and omni or LEM light power within Podium Walker. You can always turn of LEM lighting support directly through the tool bar. These controls will not effect the SU Podium V2 properties that are in the SketchUp model.

The image setting include Brightness, Contrast and Gamma sliders.


BUntitled-4
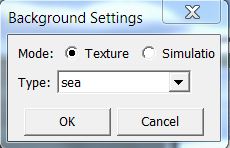
ackground Settings – Opens the Background Settings dialog box.

This include a texture and simulation mode that creates various exterior backgrounds, and provides various types of sky and ground backgrounds.


snapshotSnap Shot – Takes a “snap shot” of the Podium Walker scene, and saves a still image into the scene directory.


reloadReload – This icon causes Podium Walker to reload the SketchUp model. It’s useful if you have made some changes to the SketchUp model itself.


2. The Bottom Menu:

Time display – Time display shows the current day that the view is set to. Once you first open a SketchUp model, the time will be displayed to the same time to the SketchUp model. Also, if you import scenes from SketchUp and then change to each scene, the time displayed will match the time of the original SketchUp scene. When you use the time lapse feature, the time displayed will show your times they are updated.

Cam Height – The default camera height if your camera is in Walk mode will be 70″. However, you can change the camera height by clicking on the Cam Height icon. This action will invoke a small dialog box that will allow you to change the dimensions in inches.


3. Navigation:

As a default the PW camera is disconnected from the SketchUp camera. PW camera has different navigation controls to SketchUp’s mouse.

If you click on the Podium Walker window the mouse and keyboard control of your Podium Walker camera will change. The below description is how the mouse and keyboard controls the Podium Walker camera.

  • W/S keys will make camera make camera go forward/backward in the same plane.
  • A/D keys will make it go sideways in the same plane.
  • Holding space bar will move the camera up vertically in the Z direction
  • Shift +space key will make the camera go down in the Z direction.
  • Left mouse button will move the camera forward, backward and rotate in one plane.
  • Right mouse button will pivot the camera vertically and move the camera position forward, backward and in rotation.
  • Hold the CLT + right mouse button and move left or right and time will change. You can use REC to create a video of time/ shadow motion.

Getting Started with PW

Getting started with Podium Walker is easy.  In this six part guide, we’ll take our first look into Podium Walker, explore the interface and navigation, and explain how to create and export an animated video.  This guide assumes you already have Podium Walker installedif you’re having trouble doing so, please consult our installation guide.


1. After installing Podium Walker, open SketchUp.

Podium Walker works best on SketchUp models that have some SU Podium V2 materials or lights included. To examine Podium Walker functions, load a SketchUp model with Podium properties or download this Barcelona model from here.

Note: This model has Podium V2 reflections applied to the water.

Podium Walker can be accessed from the SketchUp plug-ins menu or from a single icon tool bar.


2. Click the Podium Walker icon to launch the PW interface.

Your current SketchUp model will get loaded (exported) into a Podium Walker window and rendered very quickly. If your SketchUp scene covers the entire viewport, it’s possible that the Podium Walker window will be behind the SketchUp window.

Your viewport should look like this image below with the SketchUp window and the Podium Walker window:


With the Barcelona model, you can see how Podium Walker quickly converts the SketchUp model and renders it using ray tracing. The Podium V2 materials properties and artificial lights are rendered as well.

NOTE: Podium Walker is not meant for still image rendering. SU Podium V2 is a much higher quality ray tracing and global illumination program. However, with Podium Walker you can navigate inside the Podium Walker window and experience real time ray tracing. It can be used a “viewer” for SU Podium V2.


4. Things to note:

  • Podium Walker also reads the time of day from SketchUp and provides natural sun and sky light. The sky environment provided by Podium Walker will change with the time of day and or position of your camera.
  • You can re-size the Podium Window dynamically.
  • Changing geometry in SketchUp or adding SU Podium V2 properties does require that you to close and reopen the Podium Walker window or use the  button from the top icon menu.
  • As a default, PW camera is disconnected to SketchUp camera. The mouse controls in PW are different from SketchUp’s. Please read the navigation section below. However, you can connect the PW camera to the SketchUp camera to obtain the familiar SketchUp navigation controls. Please read below.